
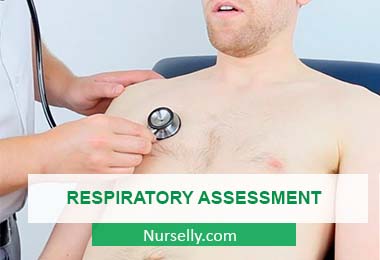
Respiratory assessment of the human body is the most integral part of all head to toe physical check-ups. It also comes in handy when identifying chronic or acute lung disease. Any proper respiratory exam requires both skill and practice.
Below are some guidelines on the steps you should follow when performing respiratory assessment and how you can identify any potential problems in your body.
What is Respiratory Assessment?
In a nutshell, respiratory assessment refers to examination of the respiratory system. A qualified healthcare provider will conduct a respiratory assessment on a patient as part of a complete physical exam or when the patient is showing any of the following signs:
- Has savvier chest pain
- Difficulty in breathing or shortness in breath (also known as dyspnea)
- Has a history of chronic lung disease such as chronic obstructive pulmonary disease or asthma
- Vital signs indicate they have a low oxygen saturation level (below 93 %)
- Consistent symptoms of acute lung disease like bronchitis and pneumonia
- Vital signs indicate the patient has an abnormal respiratory rate. The average respiratory rate of an adult is approximately 12 to25 beats per minute. The respiratory rate of children and infants is higher and will vary depending on their age.
Since certain respiratory symptoms like chest pain can be similar to those associated with conditions such as heart problems, a lung exam is normally conducted alongside a cardiac exam.
Steps for Performing Respiratory Assessment
Use of the mnemonic “PIPPA” is the best way to help you remember the basic step used to conduct any respiratory assessment. PIPPA stands for Position, Inspection, Palpation, Persecution, Auscultation
1. Positioning the Patient and Adjusting the Environment
To conduct the examination, the patient should sit upright with their hands placed at their side. The patient is then asked to expose their chest. This make it easy for the examiner to listen to their anterior sounds and also visualize the patient’s respiratory effort.
Later during the examination, the patient is asked to move their arms forward to reduce any interference from the scapulae when the doctor is listening to their posterior breathing sounds. The doctor should perform the exam in a quiet and private area with sufficient lighting.
2. Inspection of the Patient
This step is conducted immediately after the patient is in the exam room. While you observe the patient’s breathing, pay attention to the following;
- Check if the patient appears to be comfortable or in distress. Check for signs of respiratory distress such as labored or rapid breathing, sweating profusely and active usage of accessory chest muscles during breathing.
- Does the patient’s coloring appears to be normal? Someone that is in respiratory distress may display signs of cyanosis. This tends to make a person’s lips and nail beds appear blue.
- Is the patient compensating due to breathing problems? If the patient has pulmonary dysfunction, they tend to compensate by leaning forward while resting their hands on their knees. This is known as the “tripod” position and will only be seen in patients suffering from advanced emphysema or other types of COPD.
- Is the patient too short of breathe to be able to speak?
- Check if you can hear any unusual breath sounds like wheezes or gurgles with the naked ear.
- Check if patient has any form of visible deformities of the spine or chest wall. A sunken or concave chest wall may restrict normal activity of the lungs and may cause some difficulties in breathing. A barrel chest can indicate chronic over inflation of the lungs. This is normally seen in cases of emphysema. Deformities of the spine such as kyphosis, where the spine bends forward and scoliosis where the spine curves to one side, are also known to cause breathing difficulties.
3. Palpitation of the Posterior Chest Wall
Palpitation of the chest is relatively a small part of the respiratory evaluation. This is because the lungs are normally shielded by the rib cage and are not directly palpable. However, palpitation can be used to accentuate movement of the chest. For instance, you can put both arms on either sides of the spine of a patient’s back. Both arms should be lifted symmetrically every time the patient breaths.
If there is any severe lung disease or air or fluid surrounding the lung, the arm on the affected side always rises to a smaller degree. You should move your hands along the spine as the patient utters the word “ninety-nine” repeatedly. The vibrations produced should feel the same. Any parts with increased or decreased vibrations can indicate that there is fluid in or around the patient’s lungs.
4. Percussion of the Chest Wall
If you have been wondering why doctors and nurses tap your back during a respiratory check-up, there’s no need for alarm. This technique is referred to as percussion and is usually used to identify all potential parts of density in the lungs.
The following steps are followed when performing percussion.
- Stand to the patient’s back, slightly to the left hand side.
- The patient should then cross their arms to the front part of the body with their hands placed on opposite sides of the shoulder.
- Pick point the correct area of percussion, which lies between the spine and the scapula.
- Place the last two joints of mid finger (of the left hand) on the patient’s back. Strike the tip of the left finger with that of your right middle finger severally. While doing this, let your right wrist swing freely. This way, you’ll avoid pushing the finger into the affected area. which in turn could alter the sound.
- Perform percussion procedure along the right hand side of the thoracic spine, and then repeat the whole process on the left hand side of the patient’s spine.
If the percussion is normal, it will sound slightly resonant. Bacteria or fluid infiltration will sound dull. A drum-like (or tympanic) sound indicates that air is either trapped in or around the lungs, which is a sign of pneumothorax or emphysema.
5. Auscultation of Lung Sounds
To auscultate is the concluding step of the respiratory examination. It is done by listening to lung sounds through placing a stethoscope along the posterior and anterior fields of the lung. Below are examples of some abnormal sounds that might be heard.
- Crackles – These are the brief, non-musical sounds that are heard during inspiration. Crackles can either be course and low-pitched or soft and high-pitched. One of the most common causes of crackles is congestive heart failure.
- Wheezes – Wheezing indicates the narrowing of the airway. It is usually characterized by a musical sound produced when inhaling or exhaling.
- Rhonchi – This is the indication of fluid in the airway. The sound produced can be musical, bubbly and low-pitched.
- Stridor – This is when a person produces a very high-pitched musical sound. Stridor naturally indicates that there is obstructed airflow as a result of a foreign croup, object or anaphylaxis in the lungs.
You might end up finding some, if not all, of the above steps difficult or awkward at first. Like any other skill, it will take time and practice for you to perfect the technique as well as develop an ear and eye for normal and abnormal signs.